
Usermanual Internet Order App
General
With the Reflex eBestel App. you can easily use the InternetBestel website of your choice from your Smartphone or Tablet. With the help of this application you can easily search for items, view offers, fill in order patterns and finally compose and send orders. This document concerns a brief overview of the most important functionalities of the application so that it becomes clear to you how the application should be set up and how you can use the application. Before you can start using the application, you must first ensure that you install the application on your Smartphone or Tablet.
The Android application can be found via the link below:
The Apple application can be found via the link below:
Main menu
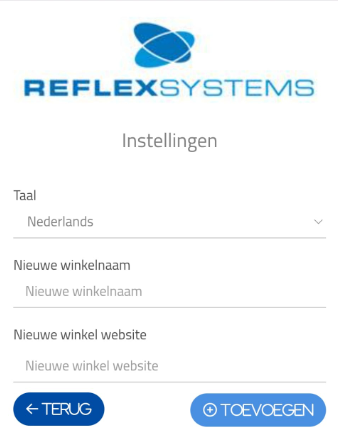
When starting the application for the first time, the Settings tab will be presented.
Simply click on your desired language to convert all text within the application to the relevant language.
You can then enter the name of the web shop under “New shop name” and enter the URL of the web shop under “New shop website”.
Confirm the entry by pressing the Enter or Confirm button on your keyboard. The application will then contact the entered InternetBestel website and save it in the App if successful.
Overview of web shops
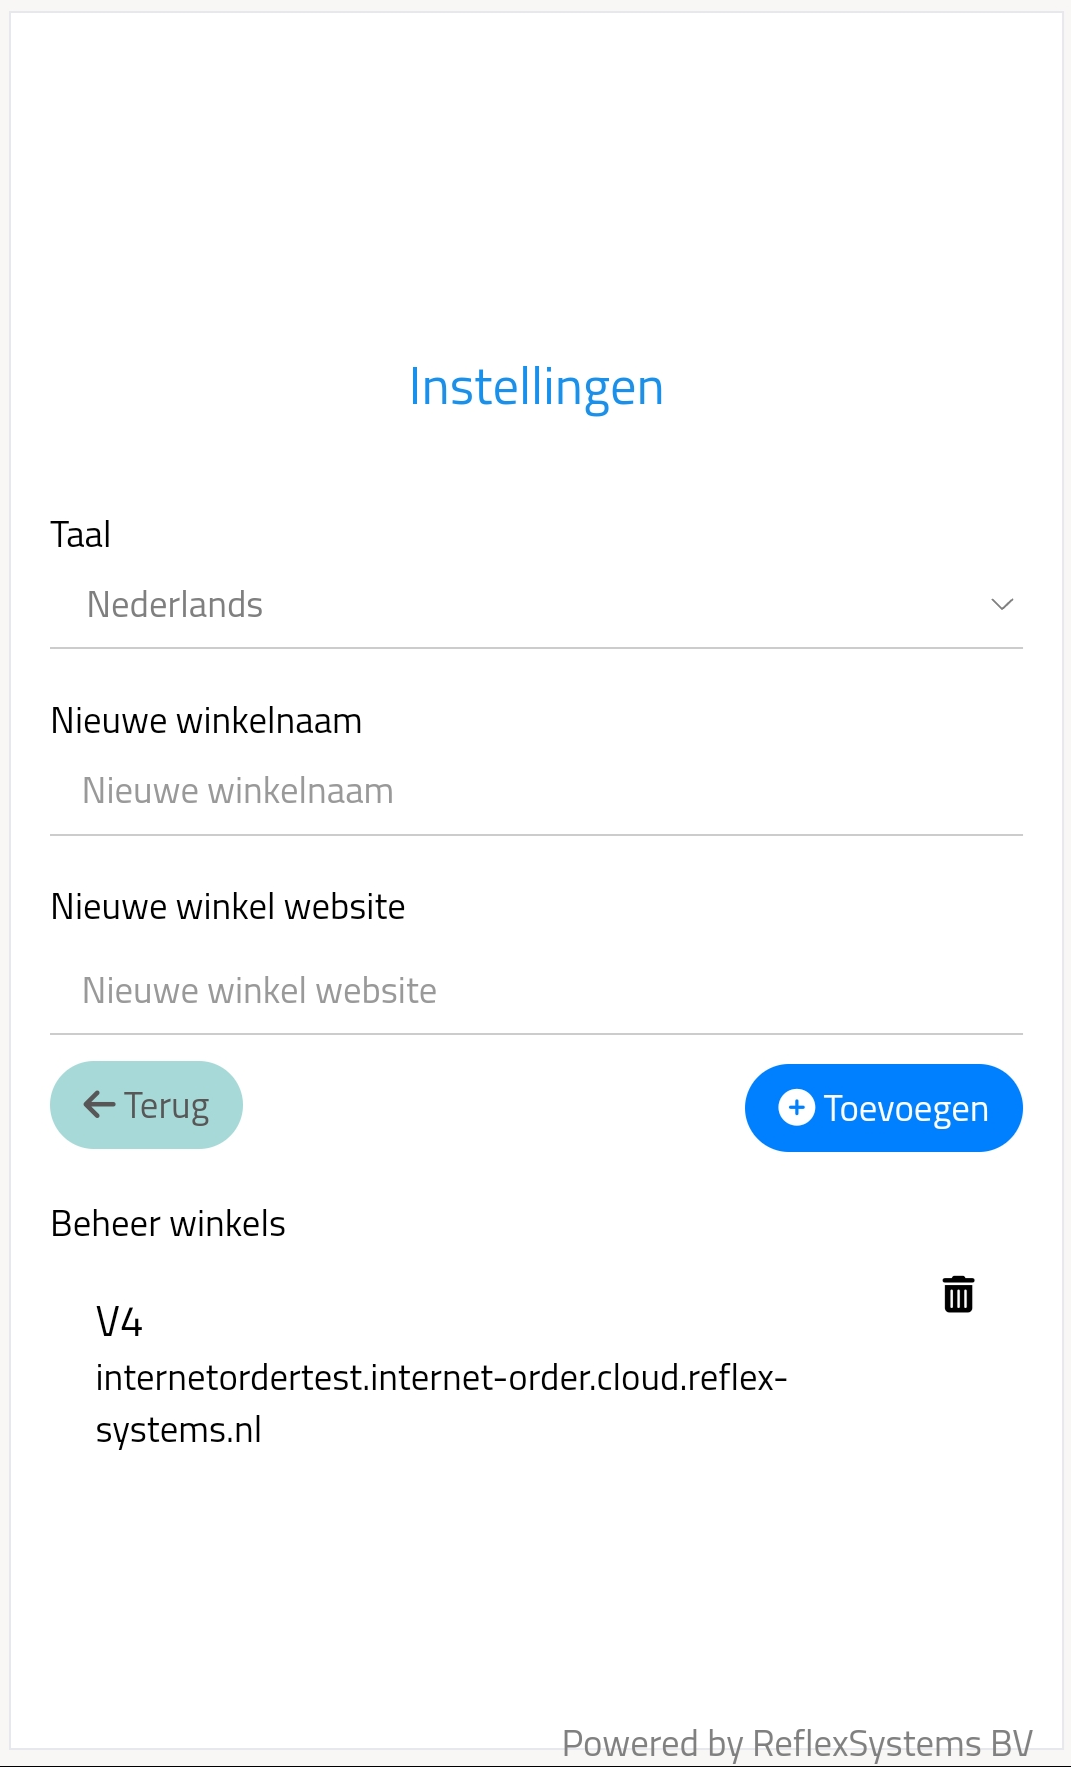 After adding the desired InternetBestel website to the App, a button will appear on the main tab with which you can log in to the website of the web shop.
If you want to remove this web shop again, simply click on the cross, after which you can confirm or cancel your choice using the pop-up.
If you want to use the webshop shown, you simply have to click on the name of the webshop to display the login screen.
Login
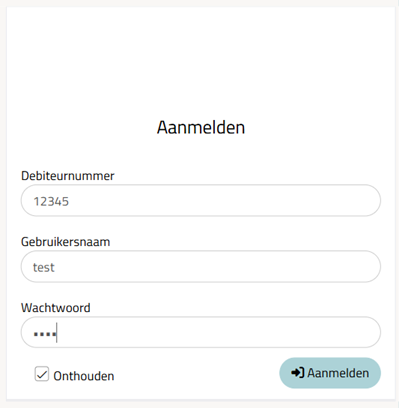 On the login screen, you simply have to enter your customer number, login name and password and confirm using the Enter or Confirm button on your keyboard.
If the login details are correct, a message will appear that you are logged in, after which you will be given access to the InternetBestel website.
The customer number and login name will be saved automatically when you log in, so that you only have to enter your password in the future.
Webshop
Delivery date
After logging in, you will end up in the webshop menu.
Here, a pop-up will first appear where you can specify the desired delivery date, if the current delivery date is in the past. You can only specify a date that falls on one of the valid delivery days specified by the relevant Internet Order website.
Search for items
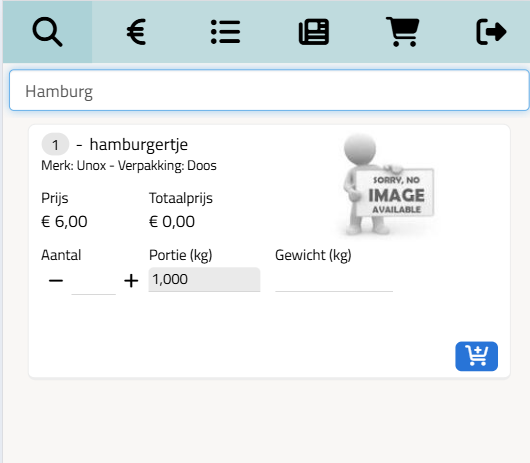 On the first tab of the webshop menu, you can search for items. By entering a search term (item name or item number) in the search bar and then confirming it using the Enter or Confirm button on the keyboard, the application will retrieve the relevant items and display them in a list.
Next to this you can also press the Scan Barcode button to open the Barcode Scanner (which can be installed for free), with which you can scan barcodes using the camera on your smartphone or tablet. After scanning, the application will automatically retrieve the relevant article. If you do not yet have an app to scan barcodes, you will automatically be asked to install it.
A red exclamation mark in the article list indicates that the relevant article cannot be ordered at this time (depending on the entered delivery date).
By clicking on this red exclamation mark, you can read in a pop-up what the specific error message is. When you adjust your delivery date (more about this later), these red exclamation marks will disappear again and you will be able to order these articles.
Input screen
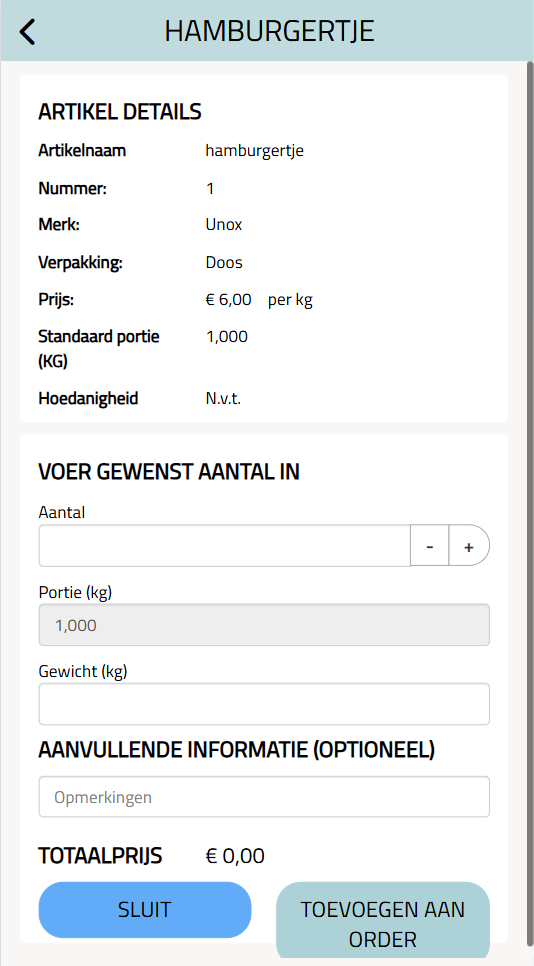
When you click on an item in the item list, the above pop-up will appear. Here you can view relevant information about the selected item and specify the exact quantities you want to order. It may happen that an input field is not available, such as the portion weight in the image above.
In addition to entering the quantities