Handleiding Beheerdersomgeving Internet Bestel V4
General
You can adjust your Internet Order shop in various parts so that it matches your corporate identity or brand identity. You can do this by using the management environment of the Internet Order environment.
You also have the option to gain insight into user data and to administer it via the Management environment. You can also post news items via this environment.
This manual explains how to use the management functions.
Logging in to the management environment
Open the URL bedrijfsnaam.internetbestel.com in the internet browser.
The login screen will now appear: 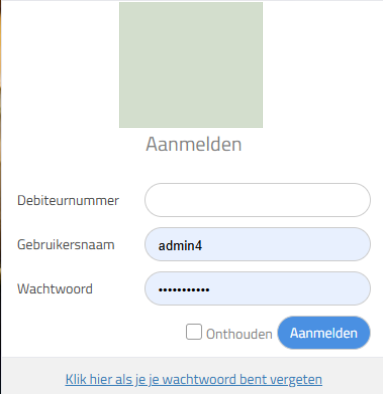
- The debtor number must remain empty
- Your account username
- Your account password
The administrator page will now open: 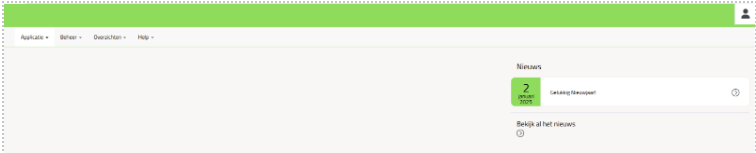
Application
Home page
Clicking on “Home page” will open the home screen of the administrator environment.
My profile
 Via “My profile” the login details for the administrator environment can be adjusted.
The gray fields cannot be adjusted. Data such as the name, password and email address of the administrator can be adjusted here.
Log out
By clicking on “Log out” you will be logged out of the administrator environment, and you will return to the login screen.
Management
News
The news items on the order site can be managed via the “News” menu:

The “Current news” tab shows the currently active news items. By double-clicking on a news item, it is opened and can be edited.
A new news item can be created by clicking on the “New” button:
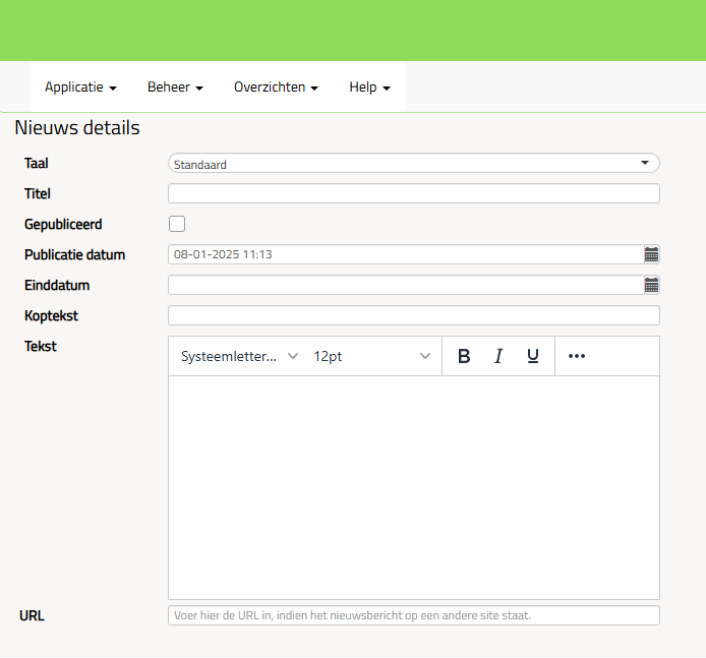
Here you can enter the title, start and end date and the news item. You can also indicate whether the item should be published or not. If the news item should contain a reference to another internet page, the relevant URL can also be entered here, which will then be added as a link to the news item.
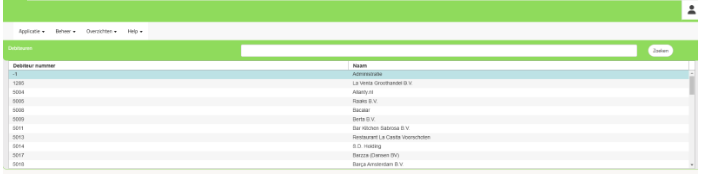
Debtors
The “Debtors” menu shows an overview of all debtors who have access to the order site:
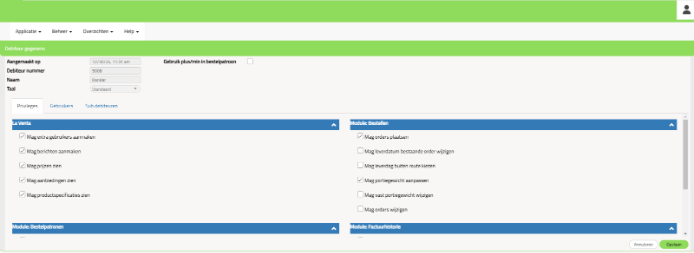
Clicking on a debtor will show the details of this debtor. On the “Privileges” tab, the rights of the debtor on the site can be adjusted:
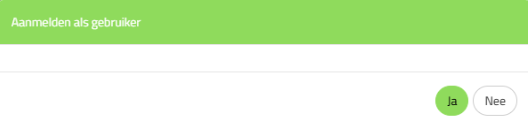
On the “Users” tab, the users of the debtor are shown:
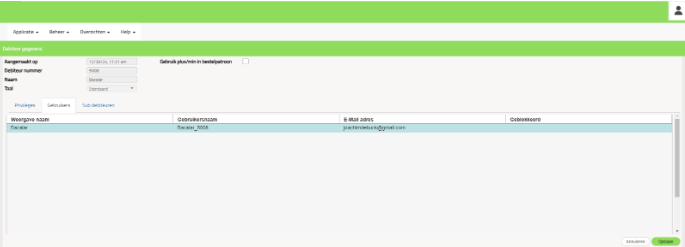
By clicking on the user, you can log in as this user (without having to enter login details) enter):
The tab “Subdebtors” currently has no functionality in Internetbestel V4.
Administration
Tab “Administration level settings”:
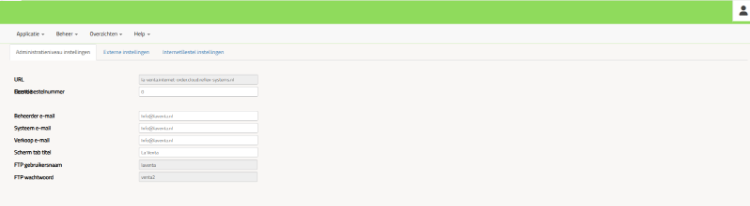
On this tab, the various email addresses for notifications from the internetbestelserver can be managed. The gray fields cannot be adjusted.
Tab “External settings”:

On this tab, a possible connection with PS Infood can be made. A license from PS Infood is required for this.
Tab “Internet order settings”:
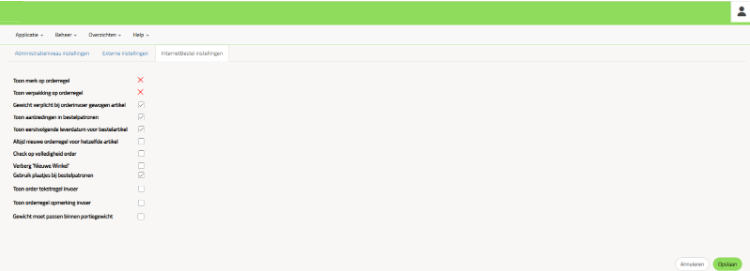
On this tab, the basic settings for the operation of internet order can be adjusted.
Design
On the “Design” tab, the presentation of the order site can be adjusted:
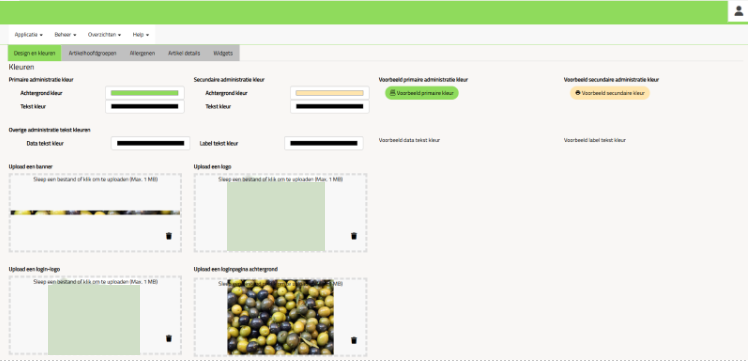
Here you can set which colors should be used, and which logos or backgrounds on the various menu items.
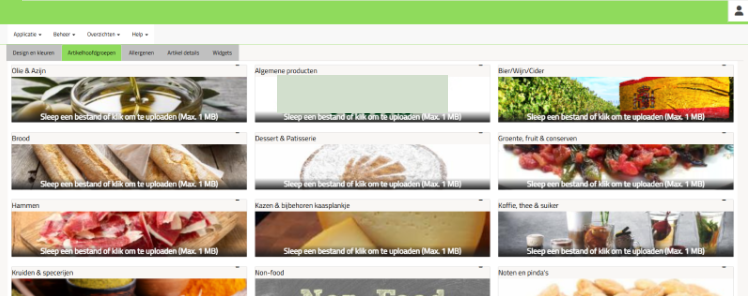
On the “Main groups” tab, images can be linked to the various main groups:
On the “Allergens” tab, images can be linked to the allergens:
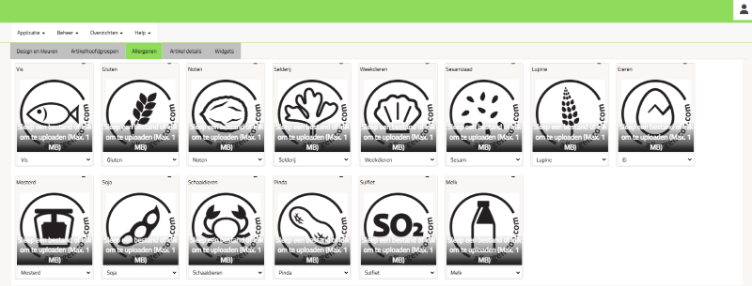
When an article contains a certain allergen, this allergen will be mentioned in both the symbol and the text. Whether an article contains an allergen must be set in the article file of ReflexBlue.
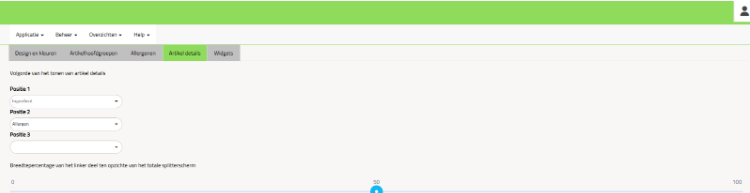
On the “Article details” tab you can set how the article details should be presented on the order site:
On the “Widgets” tab you can manage the widgets. Widgets are the “eye-catchers” that appear at the top of the home page of the order site. With this you can draw extra attention to a specific article group, offers, etc.
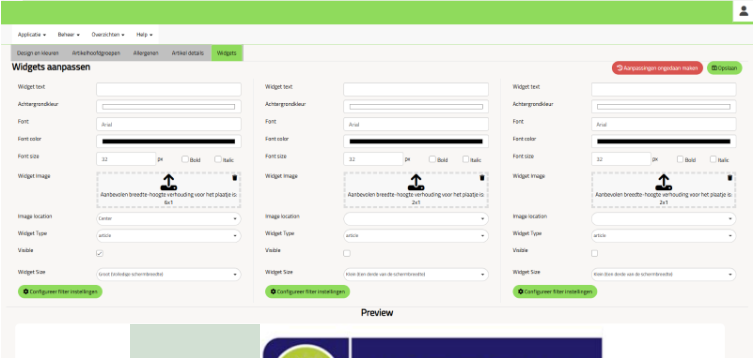
It is possible to place a maximum of 3 widgets next to each other, depending on the size.
You can adjust the text, background color and font per widget. You can also add an image. Make sure that the ratio of the image matches the size of the widget.
Using “Image location” you can determine whether the image should be displayed on the left, right or centered.
Using “Widget Type” you can create a link for this widget. There is a choice of articles or a hyperlink. If you choose “Article” you can use “Configure filter settings” to make a selection of articles that should be displayed after the user has clicked on the widget. If you choose a hyperlink you can enter a URL of a site that is opened when a user clicks on the widget.
Using the “Visible” option you determine whether the widget should be visible or not. Using “Widget Size” you can adjust the size of the widget. Note that the size of the widget determines how many widgets can be active.
At the bottom of this screen you can see a preview of the widgets.
App design
On this tab you can set whether or not the barcode scanner should be visible in the app, and on which page the app should open by default:
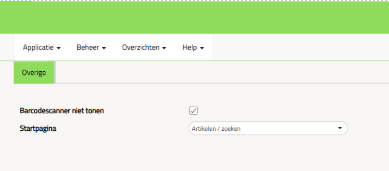
The app will adopt the default design for color schemes and images. Widgets will not be displayed on the app.
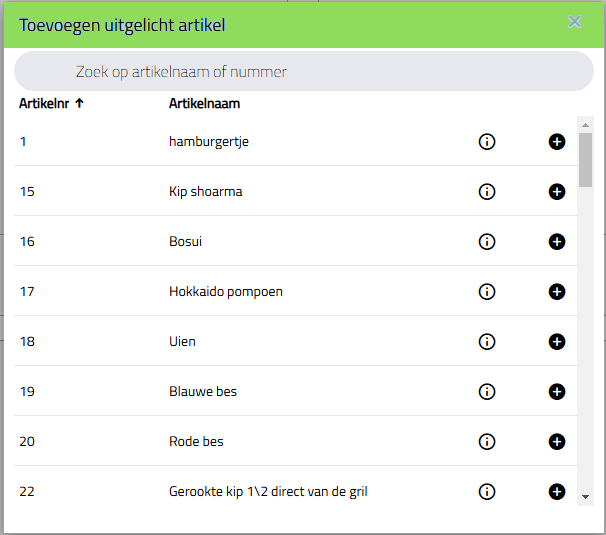
Spotlight items
Here carrousels can be composed that are being shown on the dashboard page of the webshop. 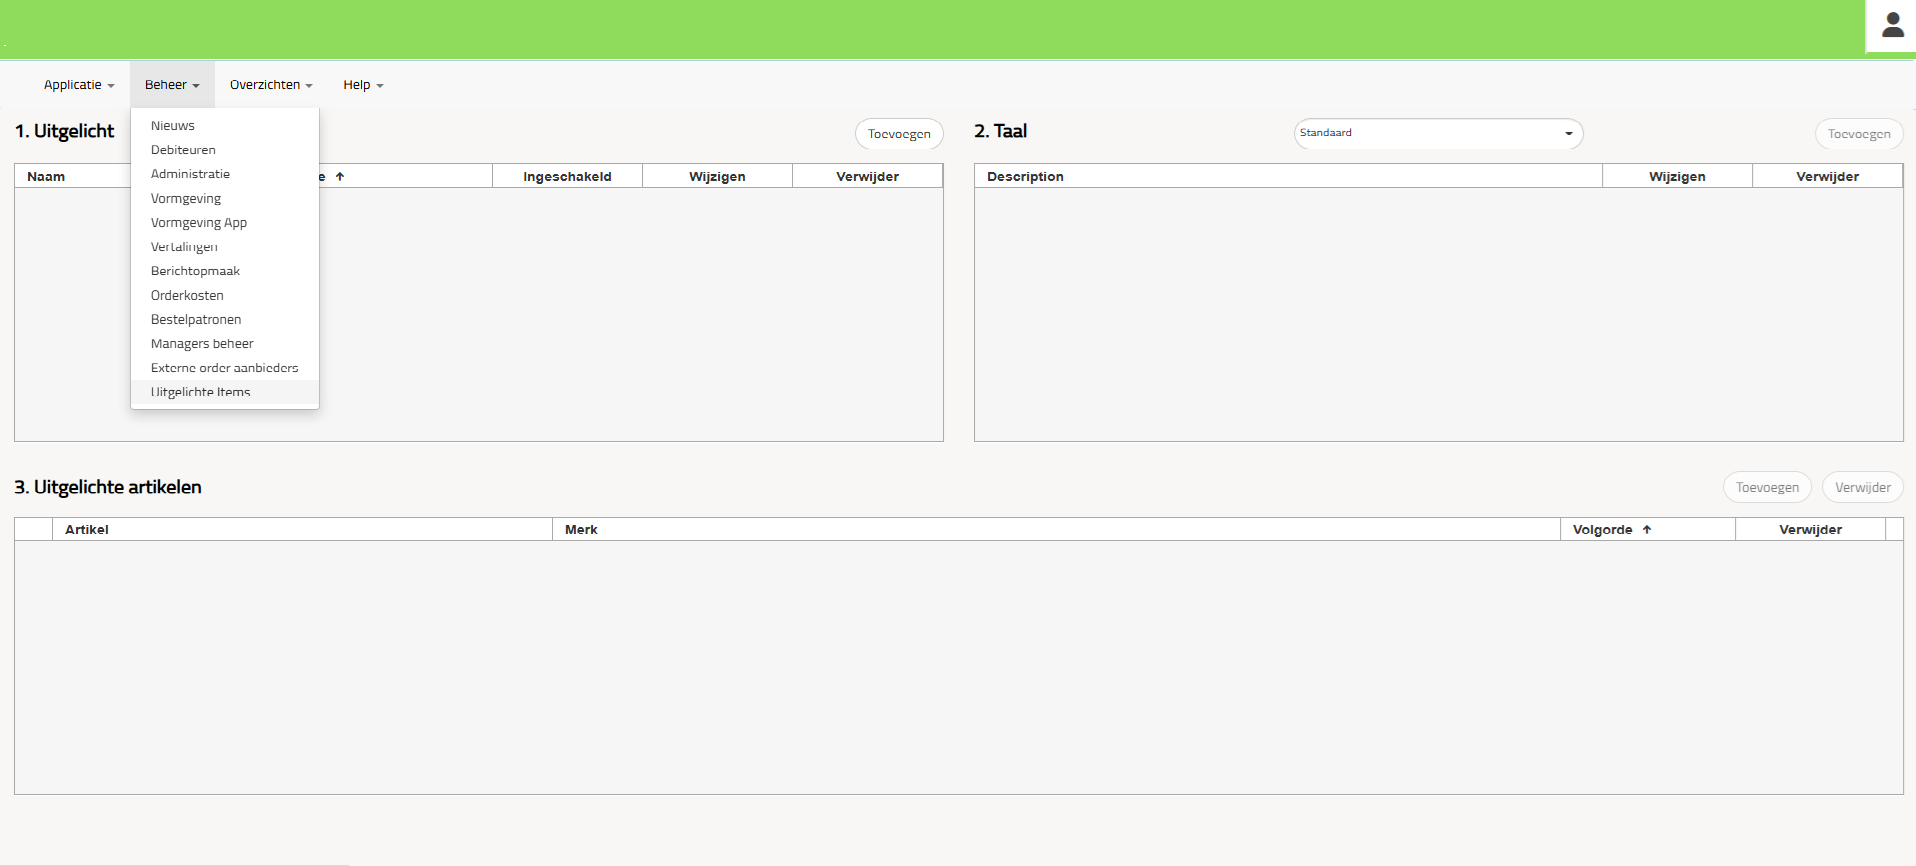
Via the button ‘Add’ (under 1. Spotlights) new spotlights can be defined and their properties can be set. 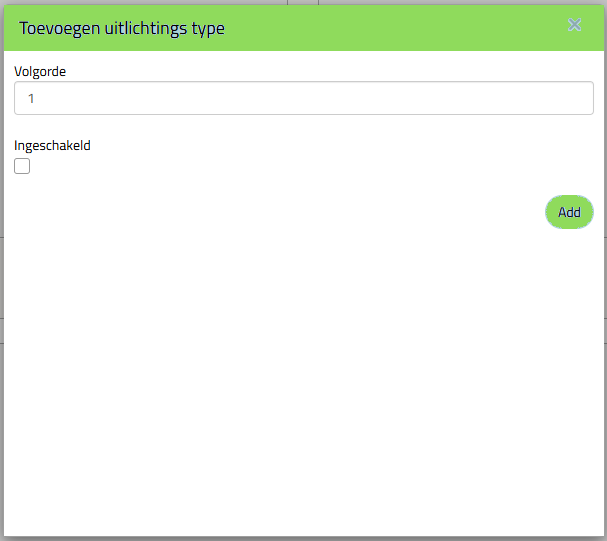
Under ‘2. Language’ you can add a description for the selected spotlight via the button ‘Add’. The language dropdown above lets you choose the language. 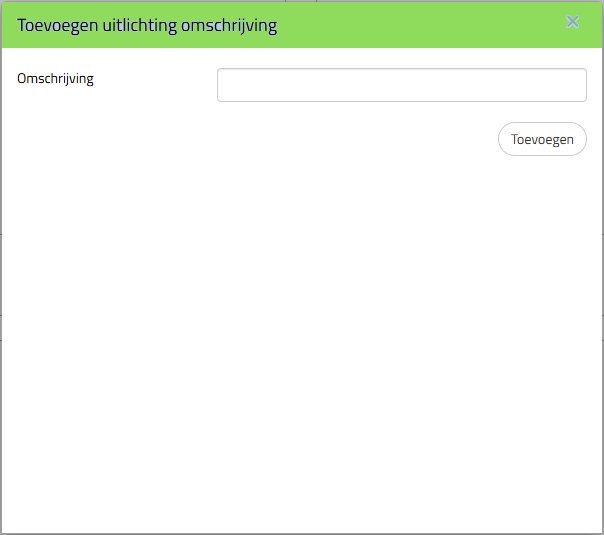
At ‘3. Spotlight articles’ you can add articles to the selected spotlight, and these will be shown in the spotlight at the dashboard page of the webshop.